Blackhat SEO

There’s a reason you don’t see spam comments on this blog. It is moderated for all comments, that’s why.

I do notice after each new post is made, a flurry of irrelevant comments appear in the cue awaiting moderation. Invariably some sort of spam (automated) attempts at link farming to boost some other site’s backlink array, blah blah blah.

After a recent very sparse post, 2 such comments appeared in the cue and the backlink address in one of them caught my eye (gscraper.com) so I decided to investigate…
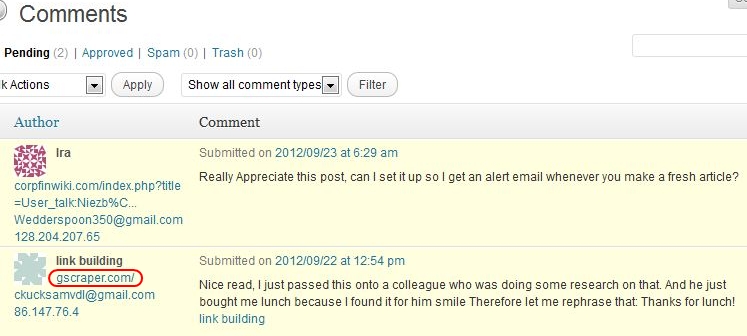
Black Hat SEO Spam

As you can see in the image above, the backlink in one of these comments is gscraper.com. A search on Google brings up a number of links to the domain but I didn’t bite right away since I was skeptical that what appears to be the perpetrator’s resource holds an unbiased answer. Next, I searched on “what is gscraper”. Behold one of the top returns was a youtube video promoting a fairly new application called gscraper.

The video is quite revealing. While the promoter is clearly touting the capabilities of the application to the target audience (Blackhat SEO users), it also has the effect of revealing the current state of their dubious craft to everyone else as well.

Basically the program is used to automate several tasks:
• harvest hundreds of thousands of URLs of blogs with new and recent posts
• spam them all with a generic comment that includes a backlink
• search the list to reveal the comments that got through unhindered
• harvest all of the active posts from the shorter list of open blog URLs
• spam the new filtered list for maximum spam density

Woah! Welcome to the world of “Blackhat SEO”. Sorry pal, oops you’ve scraped the wrong blog.

No doubt, this post will quickly get spammed. Advice to anyone who has a blog out there… “Batten down the hatches”!

Another Entertaining Blog for Engineers

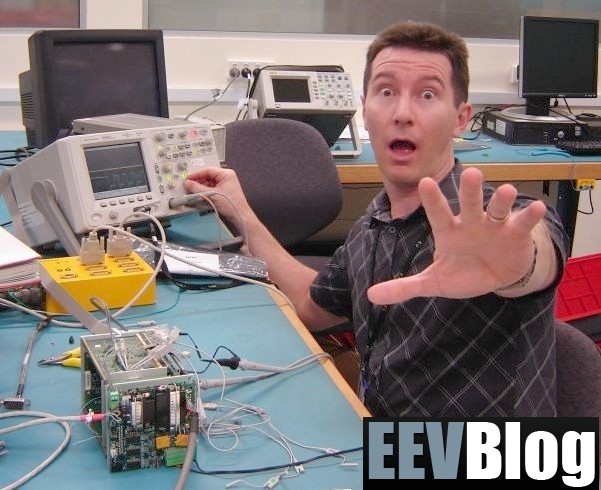
I was watching the latest “Mailbag” episode on Dave (That Crazy Australian Bloke) Jones’ EEVBlog wherein he mentions another Video Blog (VLOG?) “ToddFun.com”. Todd sent in a Chinese market Fluke meter for Dave to “analyze”. Buyer beware, the meter doesn’t stand up so well to Dave’s first impression. He hinted at fun future plans for it though, I think the magic smoke may be released soon!

By all means check out “ToddFun.com”. as well…

ToddFun

While Todd may not be quite as “Energetic” as Dave, if you like nuts & bolts it’s definitely one for your favorites.

This site “Engineer LLC” is proud to be hosted by Dreamhost.

Notice the clean composition and lack of blinking ads for the latest fad diet? Thinking, how is that possible in 2012? Actually, it’s a no-brainer.

This website Engineer LLC is hosted by Dreamhost. I have been using them for over 8 years now (ever since I started publishing public web content) and must say I am a very satisfied customer. This blog you are reading right now is hosted on Dreamhost. If you are considering opening a new web Hosting account, I strongly recommend Dreamhost. Should you choose to use their services, use the promo code NEWUSER2012 and you will get an additional discount when you create a new account with Dreamhost.

Full Disclosure: I do receive a small referral fee for referring new customers.

That’s it no hard sell, just pure internet goodness for all.

Vernon Johnson, Engineer LLC

August 22, 2012

Doubling Down with the PIC32

In an earlier post, A high density Automotive control design using the Microchip PIC32MX MCU was described. That design was a great success. However, as with all things new it was found to be in need of more I/O. The circuit board was revised to double all of the digital and analog peripheral I/O while retaining the same overall PCB outline of 5″x7″. it was also kept to just 2 layers and components on only one side, again with the help of the peripheral circuitry simplicity afforded by the Microchip PIC32MX360F512L MCU.

An update to a recent PIC32 Control System Design

While it is a bit more dense that the previous revision, it still fits without too much crowding on the 5″ x 7″ 2 layer PCB.

Vernon Johnson, Engineer LLC

Finding the Right 3D Printer

Engineer LLC will be investing in it’s first 3d Printer shortly, so we have been shopping the web for the best candidate(s). There are an number of options for the low cost (relatively) reprap based designs available. Ranging from scratch build with used parts to ready to print fully assembled units. Here’s a sampling of what I have found on the ‘net so far.

Start here with a good video synopsis of the low end of build it yourself to kit range by Neil Underwood… Still Extruding: RepRap Price Points

PrintrBot is an interesting newer product line of supplies, parts and kits. With the commendable goals of bringing the cost of entry even lower and making kit assembly simpler for beginners. This venture was launched via what appears to be the most successful Kickstarter technology campaign to date…

There are quite a few vendors popping up with offerings in the mid range with kits and some with fully assembled products such as PrintrBot listed above.

And then there’s the Granddaddy of all commercially available derivatives of the open source “reprap machine” with a Geriatric 3 years in existence… “Makerbot Industries

For our first unit, we will likely be going with the Makerbot Replicator MK8 with the dual extruder option. This one comes fully assembled and features the all important dual extruder to allow for deposition of water soluble support material. When support material deposition is available, the printer is no longer limited to making only objects that are self supporting during build. This makes the unit more competitive with much more expensive “Mainstream” FDM printers.

The 3D Printing Revolution

It seems that the 3D printing bug may be spreading to Engineer LLC. There is a growing wave of enthusiasm for low cost (relatively) 3D printers, particularly in the Fused Deposition Modeling (FDM) category. FDM is a process that uses a plastic Filament fed through a heated extruder head to print a model from a 3D CAD rendering. It’s really amazing how the capability of these printers has improved while the cost of entry has also come way down. The new developments have been spurred in large part by the open source project “reprap”. Learn more about how it got started here.

reprap.org

PIC32 SPI to MCP4922 Dual 12 bit Digital to Analog Converter

Reposted from Vernon’s Excellent Blog (original date 12/16/2011).

I recently completed an exercise in bringing up a MCP4922 DAC on the PIC32 SPI. I didn’t find any examples specifically using the PIC32 with MCP4922 or even any examples of the MCP4922 used in a 3.3v circuit. Therefore I thought a post might help the next fool that comes along and tries it…

1. The PIC32 Peripheral Library Help file is not much for detail, I found a need to dig into the SPIxCON register table in the PIC32 datasheet just to get definitions for the Input Parameter Mnemonics.

2. The CLK and SDO lines both need to be pulled up with at least 10K (I ended up using 4.7K). Further design refinements included pull ups on CS and LDAC with 10K to ensure sufficient loading on the PIC32 outputs, .01uf bypass caps on the outputs to filter the switching noise out and closer coupling of the MCP4922 P/S bypass caps to 4mm or less from the Vdd pin as recommended in the datasheet.

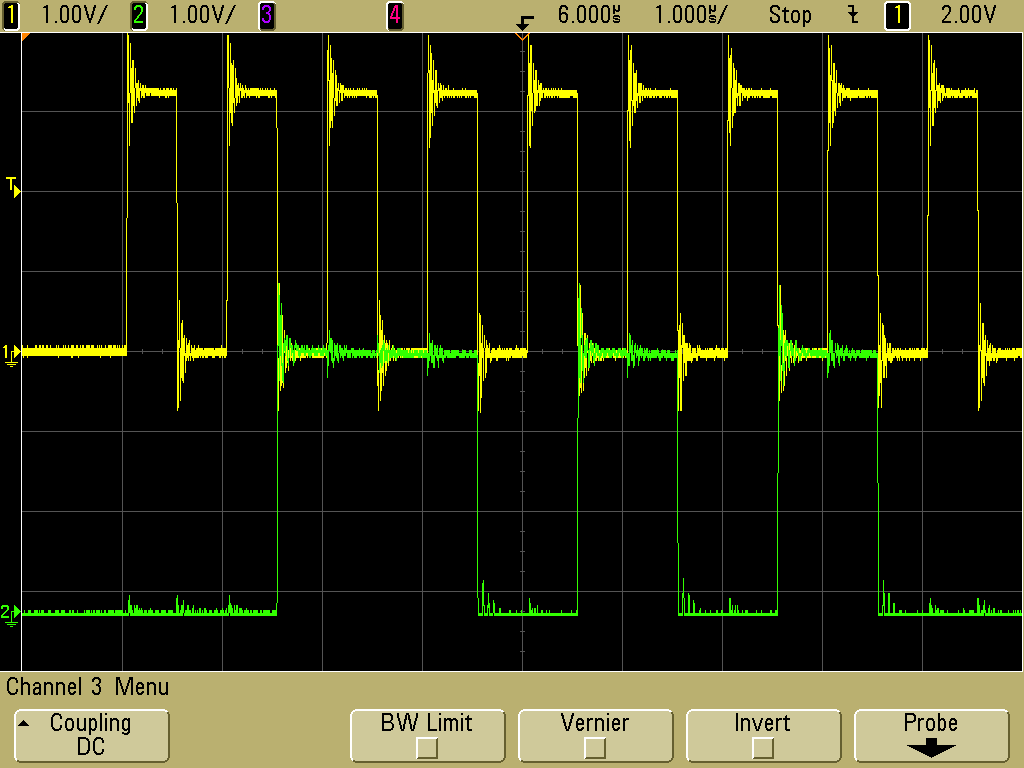
3. When halting just after a TX everything worked OK but it got unstable when I let it run free at an update rate of 10HZ or even slower. After much troubleshooting (including assuming that I had damaged the DAC chip) scope trace snapshots revealed the instability was due to a data/clock sync error. Specifically the clock burst was terminating early on random data write events. I found that it requires the CKE transition to be inverted (CKE = 1, [SPI_OPEN_CKE_REV]) to shift data out before the clock to run stable. Indeed, now it runs smooth and clean at a 1MHz SPI clock rate. YAY!

Here’s the SetDAC Function (Written in C32 v2.01)

SetDAC_PIC32_MCP4922.txt

And now it works!

Clock and Data Waveforms @ 1MHz

Clock and Data Waveforms @ 1MHz

Happy Coding…

HV Analog Isolator/Scaler

In EV electronics, the Electrical Storage System (ESS) is typically isolated from the lower voltage system for lighting and accessories. In many installations this creates a need for isolated signal conditioning for ESS instrumentation when that instrumentation is powered by the low voltage system.  I found an off the shelf “Demo Board” for the Analog Devices AD7400A Isolated Sigma-Delta Modulator that made it quick and easy to build up an Isolator/Scaler module for monitoring the ESS with a 0-500V range.  The output is compatible with the 3.3v range of the custom control module on a prototype vehicle that is currently under test.

HV Analog Isolator/Scaler

The HV input and 12v power source are fused for protection. The HV input is divided to yield a 0-320mv range at the input of the AD7400A. The output produces a fully isolated and scaled voltage of 1.65 to 3.3v that is linear (difficult to achieve with more common optical isolator circuits). The output is essentially an isolated and 5X amplified version of the 0 to 320mv input with a floor of 1.65v This equates to an ~1.65v range on the output (0.320 X 5).

For more detail on how the AD7400A and support circuits work on the Demo Board, see Analog Devices Circuit Note # CN0185.